A little while ago, I wrote about my new love of herbed fruit jams. Before that, I told you about the Japanese knotweed jelly I was enjoying. If you hadn't figured it out, I really love making jellies and jams.
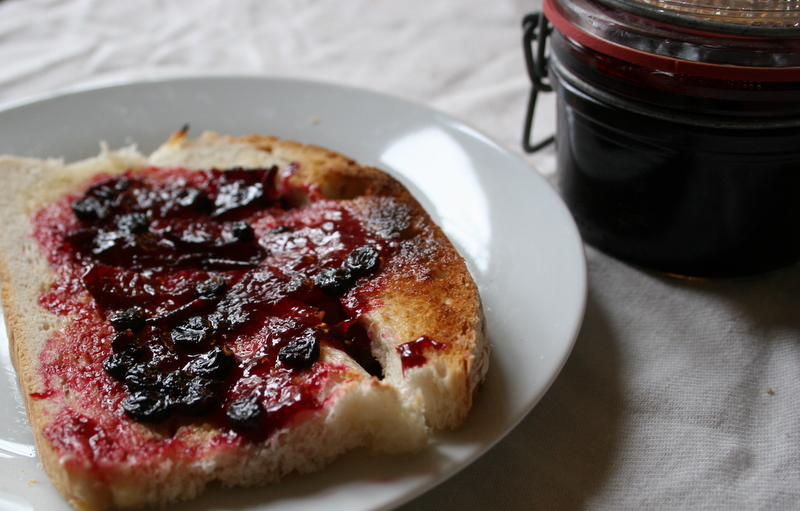
I've said before that preserves make me feel rich. All lined up in my pantry, they're like luminous jewels, ensuring that, no matter what goes wrong in this world, I have something tasty to spread on my toast.
There was a time when I didn't consider anything less than an 6-pint batch of jam to be worth my time. I wanted, for my efforts, to have at least a dozen 1/2-pint jars gleaming at me, their tops pinging shut amid the steam and the stickiness of my fruit-spattered kitchen. It was thrilling. I felt like an old-fashioned homesteader, a pioneer wife lovingly preserving the season's bounty for my adoring family.
But that was a simpler time, before my family grew to include two boys who, if left unattended for five minutes, will destroy one another or my home (or both). I just don't have the hours I once had to dedicate to the pitting of cherries or the peeling of apples. My preferred method of fruit preservation, these days, is cutting it up, winging it into bags, and stashing it in the deep freeze, then keeping my fingers crossed that we don't lose power for any length of time over the winter.
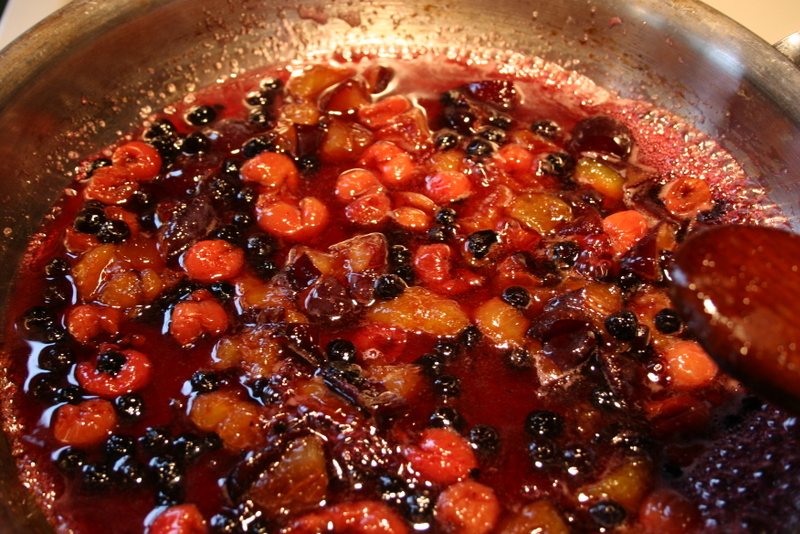
And yet, this family still needs jam. For toast, for sandwiches, for dropping spoonful-heavy into bowls of thick, white yogurt. So what do I do? I go to the freezer, bust out a few cups of frozen berries or some plum or peach halves, and then toss those into my trusty stainless steel skillet. This is one circumstance when I don't use my cast-iron pan: the iron can discolour the fruit, and the oil that seasons the pan can leave a weird slick on the finished jam. For one jar of jam, I use about a cup and a half to two cups of fruit, and somewhere between three-quarters of a cup and a cup and a half of sugar, depending on how tart the fruit is. If the fruit is in big pieces (like peaches or plums), I cut them up, or just leave them whole and take a potato masher to them as they cook down in the pan. I stir them together in the skillet, and cook them over rather high heat, stirring with a wooden spoon to make sure the fruit doesn't stick. When it's nicely simmering and the individual pieces of fruit are starting to break down (between 5 and 15 minutes, depending on the fruit), I squeeze in about a tablespoon of lemon juice (from a bottle). After another few minutes of simmering the jam should be thickening up nicely. I do the usual test to see if it's set up enough: I keep a bunch of spoons in the freezer, then test the jam by taking one frozen spoon, dropping some of the jam on it, then waiting a minute and seeing if it wrinkles when I stick my finger in it. Wrinkles mean it's ready. Then I scrape the whole thing into a clean jar, put a lid on it, and let it cool completely before putting it in the fridge.

There are some excellent advantages to making one jar of jam at a time. Because it's going straight into the fridge (and then onto my toast), I don't bother setting up the canner or sterilizing everything, any more than I would sterilize containers before packing away leftovers. Squeaky clean is good enough. The small amount is perfect for trying handfuls of fruit leftover from last year's freezer stash, or from the kids' snacks and lunches, or the one or two pieces of fruit looking a bit shriveled on the counter. If the combination works out, you can feel triumphant about having salvaged fruit that would otherwise have ended up in the compost, and if it doesn't work out (which really practically never happens), you can always bake it into a cake or muffins something, rather than having to suffer through a dozen jars of unpleasant preserves. If it doesn't thicken up, no big deal - pour it on ice cream or yogurt or pound cake, and try a new combination for the next jar.
When my kids are a little older, and I can shoo them away for long enough to do some massive batches of jam, I'll be right back into it, I'm sure. I still love those long lines of gleaming jars along the pantry shelf, and I love that sound of snap lids snapping away. But I won't let my lack of time stop me from making delicious jam whenever I have twenty minutes or so to spare. If you've been wary of preserving because it's so time consuming, maybe you just need to start slow - one jar at a time.